
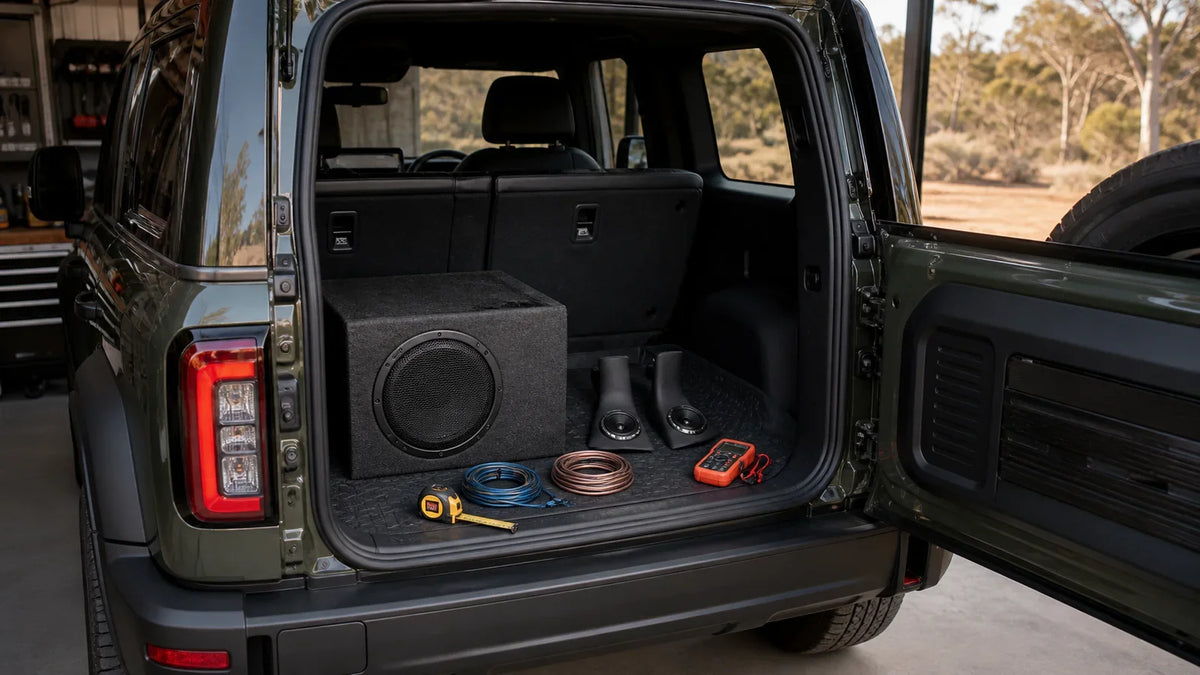
A successful Tank 300 subwoofer upgrade starts with identifying the exact factory audio system, not with choosing the largest speaker or amplifier. Confirm the vehicle's model year, powertrain and grade, inspect the existing speakers and amplifier, then plan signal integration, electrical demand, mounting and cargo use as one system.
The aim is controlled bass and a balanced front soundstage without warning lights, damaged trim, airbag interference, loose equipment or lost access to the cargo area. If the problem is weak vocal detail rather than low bass, an A-pillar speaker upgrade may be a more relevant first step than a subwoofer.
Quick answer: what should you check before a Tank 300 subwoofer upgrade?
Confirm these eight points before ordering:
- Exact model year, powertrain, grade and factory speaker system.
- The listening problem you want to solve: bass depth, clarity, output or rattles.
- Whether the factory head unit and amplifier provide a suitable audio signal.
- Subwoofer impedance, enclosure requirements and amplifier compatibility.
- Safe power, fuse, earth and remote-turn-on arrangements.
- Cargo-space, seat, trim and service-access requirements.
- A-pillar airbag, clip, connector and speaker-fitment details.
- Professional installation, tuning and post-installation checks.
Do not order from a vehicle name alone. The current Australian Tank 300 range includes different grades and powertrains, and audio equipment can vary by specification and production period.
1. Identify the factory audio system first
Start with the current vehicle, not a forum post or an overseas installation. Record:
- model year and build date;
- petrol, hybrid, diesel or plug-in hybrid powertrain;
- Lux, Ultra or other grade;
- right-hand-drive Australian-market specification;
- factory speaker count and any visible audio branding;
- factory amplifier or DSP location, if confirmed; and
- previous audio or electrical modifications.
GWM Australia's current Tank 300 interior page describes an Infinity 9-speaker system, while the current Australian Tank 300 brochure shows that speaker-system descriptions differ across variants. Treat the brochure as a starting point and inspect the individual vehicle before buying parts.
Useful evidence includes photos of the A-pillar trim, cargo-side trim, existing speaker labels and connectors. If an installer can read the factory system diagram or measure the signal safely, include that information in the plan.
2. Define the result before selecting equipment
“More bass” can describe several different problems. Listen to familiar tracks at a sensible volume while the vehicle is parked and note what is missing.
| What you notice | Possible first investigation | Do not assume |
|---|---|---|
| Bass lacks depth at low volume | Factory subwoofer output, signal roll-off and enclosure limits | A larger woofer will work from the existing channel |
| Vocals or cymbals sound dull | A-pillar and front-speaker output, balance and tuning | A subwoofer will improve high-frequency clarity |
| Sound becomes harsh when raised | Source level, factory processing, amplifier headroom and speaker condition | More amplifier gain is the safe solution |
| Bass rattles the cargo trim | Loose panels, mounting and resonance | The speaker itself is defective |
| Sound changes greatly between seats | Balance, time alignment and DSP tuning | Replacing one speaker pair will correct the whole cabin |
Write down the priority and the acceptable trade-offs. A compact touring setup may value retained cargo space and moderate output. A sound-quality build may prioritise careful signal processing and tuning. Those are different projects with different budgets and installation work.
3. Map the signal path before buying a subwoofer or amplifier
A subwoofer needs a suitable audio signal as well as power. The installer should determine whether the planned equipment will use a factory low-level output, a speaker-level input, a line-output converter or a DSP interface.
Confirm:
- which factory channel carries usable low-frequency content;
- whether that signal changes with volume, drive mode or factory equalisation;
- whether the factory system limits bass as volume rises;
- how left and right signals will be combined, if required;
- how the aftermarket amplifier will switch on and off; and
- whether warning tones, hands-free calling and factory controls remain normal.
Avoid cutting factory wiring until the signal and connector plan is documented. A plug-compatible harness can simplify removal and fault-finding, but “plug and play” still does not prove that the signal, polarity or impedance is correct for every Tank 300 variant.

Concept planning reference only: an installer must verify the factory signal, protected power path, impedance and safe routing for the actual vehicle and equipment.
4. Match the subwoofer, enclosure and amplifier as a system
The driver, enclosure and amplifier must be selected together. For a Tank 300 subwoofer upgrade, compare continuous power ratings rather than peak marketing numbers, then confirm the final voice-coil wiring presents an impedance the amplifier supports.
Ask for these details in writing:
- subwoofer model and voice-coil configuration;
- final wired impedance;
- recommended sealed or vented enclosure volume;
- amplifier continuous output at that impedance;
- high-pass or subsonic filtering where relevant;
- expected current draw and cable requirements; and
- how the enclosure will be secured.
An enclosure that is too large can obstruct cargo use, while a small enclosure may not suit the selected driver. Do not use a generic online box size when the subwoofer manufacturer specifies a different internal volume or port arrangement.
5. Protect cargo space, access and mounting points
Before choosing a subwoofer position, measure the cargo area with the rear seats in the positions you use. Check clearance for:
- rear-seat folding and recline;
- tailgate movement and loading path;
- jack, tools and emergency equipment;
- 12-volt outlets, vents and service panels;
- tie-down points and cargo restraints;
- fridge, storage boxes and touring equipment; and
- removal of the enclosure for maintenance.
The enclosure must remain controlled during braking, cornering and rough-road travel. Do not treat trim screws, a shelf edge or a convenient interior bracket as a rated restraint point without documentation.
If the cargo area already carries racks or camping equipment, review the Tank 300 trunk storage checklist before committing to the audio layout. Plan the storage and audio systems together so one installation does not block the other.
6. Know what an A-pillar speaker upgrade can—and cannot—do
An A-pillar speaker pair and a subwoofer solve different parts of the system. A-pillar speakers primarily affect the upper-frequency presentation and front soundstage. A subwoofer is intended for low-frequency reproduction. Replacing one does not automatically replace the function of the other.
Decision Maker 4X4 currently lists an A-Pillar Speaker Pair for GWM Tank 300. The listing identifies a speaker pair for compatible Tank 300 petrol and hybrid interiors, but fitment still depends on the A-pillar trim, factory audio wiring, connector, amplifier or DSP setup and airbag layout.

The current product listing shows a pair of A-pillar speakers and wiring components. Confirm the exact vehicle, connector and package contents before ordering.
This product is not described as a Tank 300 subwoofer. It may be considered as one part of a broader audio plan when the aim includes front-stage clarity. Owners focused only on deeper bass should first confirm the factory subwoofer, enclosure and amplifier path with an audio installer.
7. Plan power and wiring around the vehicle's safety systems
Aftermarket audio wiring should be sized, protected, routed and terminated for the actual equipment. The plan should include a correctly selected fuse close to the power source, a suitable earth point, protection through panels and secure separation from heat, sharp edges and moving parts.
A-pillar work requires extra care because curtain airbags, clips and factory wiring may be located behind or near the trim. Do not place a speaker, cable, crossover or loose connector in an airbag deployment path. Do not drill, cut or reinforce the pillar trim without confirming the vehicle-specific installation method.
Professional installation is recommended when the work involves factory amplifiers, DSP integration, airbags, high-current power cable or trim that affects safety equipment. Ask the installer how the vehicle can be returned to standard and how faults will be diagnosed later.

An installed A-pillar speaker must clear the trim, glass and any safety-system deployment area. A product image shows the general location, not confirmed fitment for every variant.
8. Tune and test the completed system methodically
The first test should be controlled, not a maximum-volume demonstration. Begin with amplifier gain low, verify left and right output, then confirm polarity, phase, crossover behaviour and the absence of abnormal noise.
After reassembly:
- check that all vehicle warning lights clear normally;
- test infotainment, calls, prompts and steering-wheel controls;
- listen for alternator whine, clicks, distortion and panel rattles;
- confirm the amplifier and wiring do not become abnormally hot;
- operate the seats, doors and tailgate through their full movement;
- confirm the enclosure and loose equipment remain secured; and
- save the final DSP or amplifier settings with the installation record.
Recheck the system after several drives on typical roads. Trim fasteners, enclosure mounts and cable protection are easier to correct early than after a long touring trip.
Tank 300 audio fitment enquiry template
Copy this list into a message when asking an installer or seller to check the project:
Vehicle: GWM Tank 300
Model year and build date:
Powertrain and grade:
Factory speaker branding/count:
Existing amplifier or DSP confirmed: Yes / No / Unknown
Main goal: Deeper bass / Better clarity / More output / Reduce rattles
Planned subwoofer, enclosure or speaker product:
Cargo equipment that must remain accessible:
Photos of A-pillar, cargo trim and connectors attached: Yes / No
Professional installer selected: Yes / No
You can contact Decision Maker 4X4 with the vehicle details, review the current Tank 300 interior accessories, and share photos before ordering the A-pillar speaker pair.
Frequently asked questions
Does every Australian Tank 300 have the same audio system?
Do not assume so. Current GWM Australia material describes multiple 9-speaker configurations across the range, including Infinity-branded and premium descriptions. Model year, grade, powertrain and production changes can affect the installed equipment, so inspect the exact vehicle.
Is the Decision Maker 4X4 A-pillar speaker pair a subwoofer upgrade?
No. The current product is listed as an A-pillar speaker pair. It can support a wider audio plan, but it does not perform the same low-frequency role as a subwoofer.
Can a powered subwoofer be connected directly to factory speaker wiring?
Only when the powered subwoofer accepts the available signal and the connection method is compatible with the factory system. Confirm signal level, polarity, bass processing, turn-on behaviour and wiring before connection.
What should be measured before choosing an enclosure?
Measure the usable floor and side-trim space, tailgate loading path, rear-seat movement and access to tools, outlets and service panels. Also confirm the internal enclosure volume required by the selected subwoofer.
Should a Tank 300 audio upgrade be professionally installed?
Professional installation is recommended when the project affects A-pillar trim, curtain airbags, factory amplifiers or DSP, or requires a high-current power cable. A qualified installer can test the factory signal, plan safe routing and tune the completed system.
GWM Australia specifications and the Decision Maker 4X4 product listing were checked on 23 August 2026. Vehicle and product specifications can change. Confirm the current vehicle, product listing and installer requirements before ordering or installation.